## Introduction: The Allure of Perfect Scrambled Eggs
There is perhaps no dish in the culinary world that holds as much symbolic power as the humble scrambled egg. It is the quintessential comfort food, the universal promise of nourishment upon waking, and a foundational element of breakfast menus across the globe. Whether enjoyed on crisp toast with a drizzle of hot sauce or tucked inside a hearty sandwich, the perfect scrambled egg brings a sense of satisfaction that few other foods can match. However, achieving that ideal state—creamy, custard-like, golden yellow, and tender—is deceptively difficult for even experienced cooks.
We have all been there. You crack two or three eggs into a bowl, pour them onto a hot skillet, stir furiously, and seconds later, you are left with a curdled mess of dry, gray-tinted rubber. It is a frustrating experience that can ruin an otherwise promising morning. The disparity between success and failure often lies in subtle details that beginners overlook. Factors such as heat management, the timing of salt addition, the choice of fat, and the consistency of motion play critical roles in determining the final texture.
In this comprehensive guide, we will dissect the anatomy of the perfect scrambled egg. We move beyond basic recipes to explore the science behind egg coagulation and the culinary techniques used by professional chefs to achieve superior results consistently. By understanding the mechanics of how proteins react to heat and acid, you will gain the confidence to whip up breakfast excellence daily. This article serves as your ultimate roadmap to mastering this essential skill, transforming your morning routine from a chore into a moment of culinary delight. So, roll up your sleeves, preheat that stove, and prepare to conquer the art of the perfect scramble.
## Essential Ingredients and Equipment Checklist
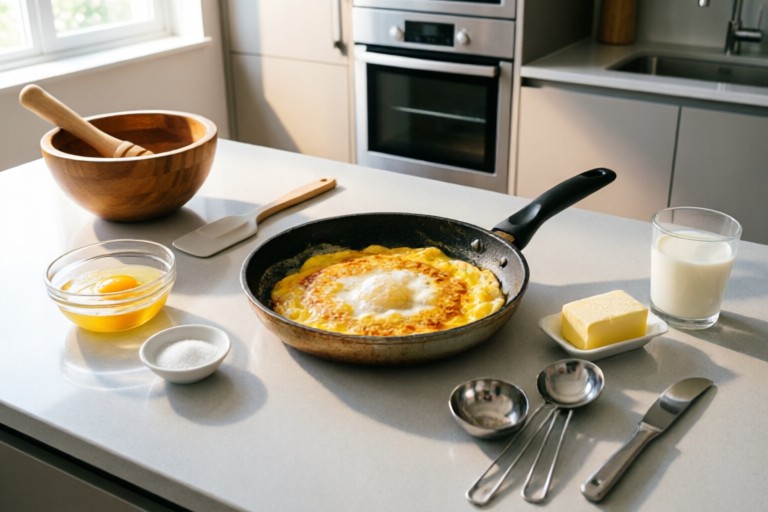
Before you even turn on the burner, the foundation of your success is laid in your preparation phase. The belief that eggs alone define the quality of your dish is a common misconception. While the eggs themselves are the star, the supporting cast of ingredients and the tools you use to handle them dictate the final outcome. Gathering the right equipment ensures safety, efficiency, and the ability to control variables like heat and friction.
### Understanding the Importance of High-Quality Ingredients
Start with the eggs. While large eggs are standard, the grade of the egg matters significantly for flavor and texture. If budget permits, opt for free-range, organic, or pasture-raised eggs. These eggs tend to have richer yolks due to the varied diet of the hens, resulting in a deeper color and more robust flavor profile compared to conventional caged chicken eggs. Look for eggs with bright orange yolks rather than pale yellow ones. While fresh eggs are generally preferred for poaching, slightly older eggs (around 7 to 10 days old) are actually easier to peel if you were boiling them; however, for scrambling, very fresh eggs work beautifully. Just ensure they are within their expiration date for optimal taste.
Next, consider the fat. Butter is the traditional champion for scrambled eggs, imparting a nutty, creamy flavor that cannot be replicated by margarine or vegetable oils. Unsalted butter allows you to control the sodium levels precisely. Some chefs prefer clarified butter or ghee, which eliminates milk solids that might burn at higher temperatures, allowing for a cleaner flavor. Others argue that adding a splash of heavy cream or crème fraîche introduces extra richness and delays the setting of the proteins, resulting in softer curds. Dairy choices are personal preference, but avoiding water-heavy milk is crucial, as added water can steam the eggs and make them tough.
Regarding seasonings, salt is the contentious variable in egg cooking. Most high-quality table salts will suffice, though finishing salts like sea salt flakes add a pleasant crunch and burst of salinity. Freshly cracked black pepper adds a warm, spicy note that complements the savory earthiness of the eggs. Don’t forget the finishing touches; fresh herbs like chives, parsley, or tarragon elevate the aroma instantly, while sharp cheeses like cheddar, goat cheese, or feta provide pockets of melt-in-the-mouth goodness.
### The Toolkit for Success
Equally important as your ingredients is your equipment. The skillet you choose determines how evenly heat is distributed. Non-stick skillets are the safest recommendation for beginners because they require less fat to prevent sticking and make cleanup effortless. They allow you to cook at lower heat without the worry of eggs adhering to the surface and burning. However, stainless steel skillets offer superior heat retention once seasoned correctly and provide better control for those seeking a slight browning effect. Cast iron is also excellent, especially for retaining heat, but requires good seasoning maintenance.
The spatula is arguably the most critical tool. Do not use a metal spoon or whisk; it will damage your non-stick coating and lacks flexibility. Invest in a high-quality silicone spatula. Silicone offers a balance of firmness and flexibility. A rigid flat edge allows you to push the eggs effectively, while the flexible edge helps scrape the corners of the pan to incorporate all cooked portions. A wooden spoon is a viable alternative, offering a natural grip and durability, though it may not scrape as cleanly as silicone.
Finally, consider your bowl and whisk. A medium-sized bowl that is wide enough to spread the eggs thinly facilitates better mixing. Using a balloon whisk or a fork works, but a whisk incorporates air more efficiently. Ensure your utensils are clean and dry to avoid introducing water droplets into the batter.
## Mastering the Prep: Whisking and Seasoning Strategy
Once your station is set, the preparation begins. Many home cooks skip steps here, pouring eggs straight into the pan. This is a missed opportunity to optimize texture and consistency. The preparation phase sets the stage for the chemical reactions that occur during cooking.
### The Art of Whisking for Airiness
Crack your eggs gently to avoid shell fragments. Separate the yolk and white before whisking them together? Modern techniques suggest leaving them intact for a richer blend. Crack them directly into your bowl. Now comes the whisking. The goal is to fully combine the yolks and whites until the mixture is uniform in color, usually a vibrant yellow. However, over-whisking is a trap. If you whisk too vigorously for too long, you incorporate too much air, which can lead to larger foam bubbles that create holes in the final texture.
You want to strike a balance. Whisk until the whites are completely broken down and the mixture appears slightly frothy but smooth. For a silkier texture, some professionals recommend passing the beaten eggs through a fine-mesh sieve before cooking. This removes the chalaza (the stringy part of the egg) and any undissolved bits, ensuring a velvet-smooth consistency. While this is optional for home cooks, it is a pro-tip worth trying for special brunches.
Another prep technique involves tempering the eggs. For an ultra-creamy result, mix a tablespoon of cold cream, butter, or milk into the beaten eggs before they hit the heat. This acts as an insulator, slowing down the protein tightening process. Alternatively, melting a pat of cold butter into the raw egg mixture ensures that as the pan heats, the butter melts simultaneously with the eggs, coating the proteins and preventing them from seizing up too quickly.
### The Timing Debate: To Salt or Not to Salt?
Perhaps the most debated topic among egg enthusiasts is when to apply salt. Historically, the theory was that salt draws out moisture from the eggs via osmosis, potentially making them watery or tough if added too early. Therefore, some argued salting immediately before cooking was best. Modern science, however, suggests that the amount of salt used in a typical breakfast portion is negligible regarding its effect on moisture retention.
Most culinary experts now agree that salting the raw eggs does not negatively affect the texture if you intend to cook them immediately. In fact, salting early allows the salt to integrate more thoroughly into the egg proteins, seasoning the interior rather than just the exterior. This prevents the common issue of having a salty top layer and bland bottom layer.
However, if you are prepping the eggs hours in advance (meal prepping), it is safer to hold off on the salt and add it during cooking or immediately before serving. The key takeaway is consistency. Whatever method you choose, be consistent with it. If you prefer salting right before they hit the pan, do that. If you prefer mixing them in with the whisk, that is fine too, provided you do not wait an hour before cooking them. For the purposes of this guide, we recommend whisking the eggs and your chosen seasonings (salt and pepper) together until fully integrated. This ensures even distribution of flavor throughout every bite.
## The Cooking Process: Low Heat and Gentle Stirring
This is the moment of truth. The transition from raw liquid to solid curds depends entirely on your ability to control heat. Aggressive cooking is the enemy of the perfect scrambled egg. High heat causes proteins to contract violently, expelling moisture and creating a tough, rubbery texture. To achieve a creamy, velvety scramble, you must embrace patience and low temperatures.
### Temperature Control: The Low and Slow Approach
Begin by heating your non-stick pan over medium-low heat. If you have a cast iron skillet, you may need to adjust to medium. Allow the pan to warm up gradually. You can test the heat by dropping a tiny drop of water into the pan; if it sizzles and evaporates quickly, it might be too hot. Ideally, you want the pan to be warm, not smoking hot.
Add your fat (butter or oil) now. If using butter, wait until it foams and subsides slightly, indicating the water content has evaporated, but watch that it does not brown too darkly. Pour in your egg mixture. It should immediately start to set around the edges, but remain fluid in the center. At this stage, do not stand still. You need to engage in constant movement.
### Gentle Stirring Patterns for Creamy Texture
The technique of stirring defines the size of the curds. There are two main approaches: the French method and the American method. The French style focuses on very gentle, small movements to create tiny, custard-like curds that resemble soft curds of ricotta. The American style tends to involve broader strokes to create larger, fluffier chunks. Both are valid, but both rely on constant motion.
Use your spatula to sweep the eggs from the outside rim toward the center. As you touch the hot surface, the eggs will solidify quickly into a thick ribbon. Immediately fold this solidified section into the center to keep it insulated. This technique spreads the cooking evenly without applying direct heat to the entire mass at once. Imagine painting the pan with the eggs, moving constantly.
Avoid aggressive chopping or mashing the eggs. Instead, push them gently. This allows the layers to build upon one another, trapping steam and moisture within the curds. You want to see soft, large folds form rather than small, distinct grains. Stop stirring briefly only when the eggs look partially cooked but still glossy and runny underneath. Remember, they will continue to cook even after leaving the heat.
### Understanding Carry-Over Cooking
One of the most critical concepts in cooking eggs is carry-over cooking. Because eggs retain heat exceptionally well, they will continue to firm up once removed from the pan. To avoid overcooking, you must pull your eggs off the heat when they appear slightly underdone. When there is still a noticeable sheen of raw liquid remaining on the surface of the curds, remove the pan from the burner. Use residual heat to finish the job. Covering the pan with a lid for a minute can help steam-cook the top without further browning the bottom, ensuring a uniform softness.
Some chefs advocate for the “two-pan” method, where you move the pan to a cool burner periodically to regulate temperature. If you find your eggs getting brown spots, take the pan off the heat for thirty seconds before returning it. The goal is never to see significant browning unless you specifically desire a fried egg texture. Golden yellow should be the dominant color, signaling purity and freshness.
## Conclusion: Finishing Touches and Final Tips
As your eggs approach completion, the final moments determine the difference between a good meal and a great one. Pulling the pan off the stove is just the beginning; the presentation and finishing touches can transform the dish. Now that you have mastered the core technique, let’s discuss how to seal the deal and what to do with leftovers.
### Elevating Flavor with Garnishes
Do not serve plain eggs if you can avoid it. Once the eggs are plated, sprinkle your freshly chopped herbs. Chives are the classic pairing for their mild onion flavor that doesn’t overpower the eggs. Parsley adds brightness, while basil introduces a hint of sweetness suitable for Mediterranean-style dishes. Cheese should be folded in while the eggs are still warm, not tossed on top cold. Grated Parmesan, crumbled Feta, or shredded sharp Cheddar will melt into pockets of savory flavor.
Acidity can also enhance the perception of richness. A squeeze of lemon juice over finished eggs can cut through the fat and wake up your palate. For a modern twist, consider a drizzle of truffle oil or chili garlic oil just before serving to add aromatic complexity.
### Serving Suggestions and Pairings
Perfect scrambled eggs pair beautifully with various carbohydrates. Consider toasting sourdough bread brushed with butter or making a crispy hash brown alongside them. Avocado slices add healthy fats and a creamy texture that complements the eggs. In terms of beverages, coffee is standard, but fresh citrus juice or a light tea can balance a heavy breakfast. If you are hosting guests, serve them in warmed ceramic bowls to keep the heat intact. Eating cold eggs diminishes the sensory experience significantly.
### Storage and Reheating Myths
If you find yourself with leftovers (though eggs are best eaten fresh), know that refrigeration alters their texture dramatically. Reheating scrambled eggs in the microwave often leads to rubberiness. If you must reheat, do so slowly in a pan with a little added butter and a splash of water to reintroduce moisture. Freeze eggs with caution; while possible, the texture usually suffers upon thawing, making them grainy. Best practice is to consume eggs within 24 hours.
### Recap of Key Success Steps
To summarize, the path to the perfect scrambled egg relies on three pillars: Quality Ingredients, Gentle Preparation, and Controlled Cooking. Choose fresh eggs, high-quality butter, and proper non-stick gear. Whisk for integration, not aeration. Cook over low heat, moving constantly but gently. Remove from heat while still slightly wet. Trust the process, respect the heat, and enjoy the fruits of your labor. With practice, these steps will become second nature, ensuring that every morning starts with a meal that is not just fuel, but a pleasure. Embrace the flip, stir the pot, and celebrate the small victories of breakfast perfection.
Whether you are a novice learning to tie your apron strings or a veteran looking to refine your technique, remember that culinary mastery is a journey of repetition and refinement. Experiment with different dairies, herbs, and heat intensities. Find the balance that suits your unique palate. And above all, enjoy the process. The perfect scrambled egg is more than a dish; it is a ritual of morning mindfulness.
## Bonus Troubleshooting Guide
Even with the best intentions, things can go wrong. Here are quick fixes for common errors.
**Q: My eggs turned brown too fast.**
A: Your heat is too high. Immediately take the pan off the burner. Move the eggs to a cooler zone of the pan or add a cold tablespoon of butter to absorb excess heat.
**Q: The eggs are too dry and chalky.**
A: You likely overcooked them or removed them from the pan too late. Next time, stop stirring earlier. You can rescue dry eggs by stirring in a small amount of melted butter or cream at the end.
**Q: The eggs taste bland.**
A: Salt was likely the culprit. Ensure you are tasting the raw mixture before cooking. Also, consider using aged cheese or roasted vegetables to add depth of flavor.
By addressing these potential pitfalls proactively, you can avoid disappointment and ensure every batch meets your standards. Happy cooking, and here’s to many more mornings filled with perfectly scrambled glory.