## Why Your Pancakes Might Be Flat vs. Fluffy
There is perhaps nothing more disappointing than lifting your spatula to reveal a dense, rubbery disk instead of a tower of golden, cloud-like pillows. We have all been there: staring at a sad stack of pancakes, wondering what went wrong. Was it the butter? Did you forget the milk? Or was it simply a bad batch of baking powder? Achieving consistent, perfect fluffiness is less about magic and more about understanding the chemistry of your ingredients and respecting the delicate balance of aeration versus hydration.
Many home cooks mistake density for richness, but true fluffiness comes from trapped air pockets that expand under heat. When pancakes turn out flat or tough, the culprit is almost always gluten development. Flour contains proteins—gliadin and glutenin—that form a network called gluten when mixed with liquid. Too much mixing builds too strong a network, resulting in chewy, bread-like textures rather than tender, soft cakes. Furthermore, old leavening agents fail to produce enough carbon dioxide gas bubbles, which are the engines of height and lightness. By identifying these common mistakes early, we can set realistic expectations for achieving restaurant-quality results right in your own kitchen. This guide aims to demystify the process, turning anxiety over breakfast prep into confident culinary mastery.
## Essential Ingredients and Kitchen Tools
Success begins before you even turn on the stove. The foundation of a perfect pancake lies in selecting the right components and equipping yourself with the appropriate tools. While a basic pancake recipe appears simple, subtle changes in ingredients yield significant differences in texture and flavor.
### The Foundation: Flour and Leavening
All-purpose flour is the industry standard because it offers a moderate protein content, generally around 10-11%. Using cake flour, which is lower in protein, can result in a batter that lacks structure and falls apart, while using bread flour creates a toughness that defeats the purpose of a soft breakfast treat. The most critical dry ingredient, however, is baking powder. Baking powder is a double-acting agent; it reacts once when wet and again when heated. If your baking powder has sat open in a cabinet for months, it loses its potency. To test it, mix a teaspoon with warm vinegar or lemon juice. If it does not fizz violently immediately, throw it out and buy a fresh container. Without this fresh burst of energy, your batter remains heavy.
### The Wet Components: Dairy and Fat
The choice of dairy affects both flavor and acidity. Whole milk provides richness due to its fat content, which coats gluten strands and inhibits toughness. However, buttermilk is the secret weapon for ultimate fluffiness. Its tanginess adds depth, but chemically, the acidity reacts perfectly with the alkaline baking soda/powder mixture to create a rapid rise. Eggs act as binders and emulsifiers. Room temperature eggs incorporate more easily into the batter, preventing cold spots that can hinder even cooking. Butter or oil is essential for texture. Melted butter integrated into the batter adds richness, while oil brushed onto the pan prevents sticking. For the crispiest exterior and softest interior, clarified butter or ghee is superior due to its high smoke point and lack of water.
### Kitchen Tools for Precision
You do not need expensive gadgets, but specific tools improve consistency. A reliable non-stick skillet or griddle is non-negotiable. These surfaces conduct heat evenly and allow for easy release without excessive grease. Seasoned cast iron is excellent for heat retention but requires care to maintain the non-stick surface. A measuring cup with a pouring spout helps control batter flow, reducing mess and ensuring uniform thickness across all pancakes. A digital thermometer is also a pro tip; setting your pan to exactly 350°F (175°C) eliminates guesswork and ensures even cooking without burning the bottom before the center sets.
## The Critical Mixing Technique for Airiness
Once your ingredients are measured and prepped, the mixing phase is where most errors occur. This stage dictates the internal structure of your pancake. The goal is hydration, not kneading.
### The Science of Overmixing
When you whisk flour and liquid together, the mechanical action aligns the protein chains. If you continue stirring until the bowl is spotlessly smooth, you activate excess gluten. The visual cue for success is not perfection, but imperfection. You want lumps in your batter. Those small lumps are areas where the flour hasn't fully hydrated yet, and they serve as anchors for air pockets. Think of the batter as a sponge; if you squeeze it too hard (overmix), you push the air out. Stop mixing the moment the dry ingredients disappear. Even if a few streaks of flour remain, stop stirring.
### Folding vs. Whisking
A gentle folding motion is preferable to vigorous whisking. Pour your wet ingredients into the dry ones, or vice versa, and use a spatula to bring the flour from the bottom up, incorporating air gently. Some recipes suggest whipping egg whites separately to fold in later for extra lift, which works well for soufflé pancakes, but for classic morning stacks, minimal agitation is key. Do not skip the resting period. After mixing, let the batter sit for 5 to 10 minutes. This brief pause allows the flour granules to fully absorb the liquid (hydration) and lets the leavening agents begin their activation cycle. Additionally, resting allows air bubbles created during mixing to stabilize, leading to a more consistent rise when heat is applied. Skipping this step often leads to pancakes that sink as soon as you flip them.
### Consistency Matters
Your batter consistency should resemble thick pancake syrup or cornmeal porridge. If it is too runny, it spreads too thin and cooks unevenly. If it is too thick, the center stays raw while the outside burns. Adjust with small amounts of milk if needed. Always measure liquids correctly. If the batter sits out for too long, the starches may absorb too much moisture, necessitating another splash of milk right before cooking.
## Cooking Temperature and Flip Timing
Now that your batter is rested, it is time to master the heat. This is the point of no return for texture. Controlling the stovetop environment is an ongoing dance between patience and speed.
### Managing Stove Heat Levels
Medium-low to medium heat is the sweet spot. High heat scorches the sugars in the batter and browns the exterior instantly, leaving the interior doughy. Low heat takes too long, causing the batter to spread out and dry before rising. Aim for a steady 325°F to 350°F range. To test this without a thermometer, sprinkle a few drops of water onto the skillet. If they sizzle and dance vigorously without evaporating instantly, the pan is ready. If they sit and bubble slowly, it is too hot. If they boil away immediately, it is too cold.
### Greasing the Pan
Use a paper towel to wipe melted butter or oil across the skillet rather than pouring it directly. Excess oil pools and fries the pancakes instead of searing them, creating a greasy edge. Wiping ensures a thin, even film. If making multiple batches, wipe the pan clean between cookings to remove burnt bits that could blacken subsequent pancakes. Burning bits also affect the color of the batter negatively.
### Visual Cues for the Flip
Knowing when to flip is an art form. Wait until bubbles form on the surface of the pancake and pop, leaving small craters. These bubbles indicate that the batter beneath has risen and the structure is setting. Additionally, watch the edges of the pancake. When the perimeter looks matte and dry rather than shiny and wet, it is time to turn. This usually happens after 2 to 3 minutes on the first side. If you wait too long, the bottom will darken too much. If you flip too soon, the center collapses and runs back onto the pan, ruining the shape.
### The Art of the Turn
Use a thin, flexible spatula. Slide it firmly underneath the entire pancake to ensure nothing sticks. A confident, swift motion prevents tearing. Avoid pressing down on the pancake with the spatula after flipping; this compresses the air pockets you worked so hard to create, squishing them back into a dense disc. Let the second side cook for a slightly shorter time, usually 1 to 2 minutes, until golden brown. The steam escaping the pancake indicates it is still cooking internally. Once flipped, resist the urge to peek. Give it time to set.
## Serving Suggestions and Troubleshooting Common Issues
A pancake is only as good as the company it keeps, and occasionally, things go wrong despite your best efforts. Knowing how to salvage or enhance your dish ensures satisfaction every time.
### Enhancing Flavor Profiles
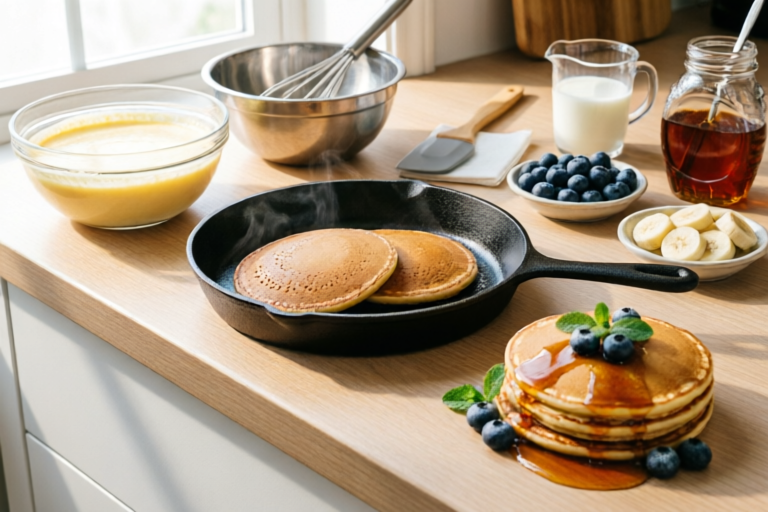
While classic maple syrup and butter are timeless, modern twists elevate the experience. Fresh berries provide acidity that cuts through the sweetness. Banana slices caramelized in brown sugar offer a tropical note. For savory lovers, cheese, bacon, and herbs work beautifully. Topping variety also adds texture. Chopped nuts add crunch, while powdered sugar offers a dusting of elegance. Drizzling honeycomb preserves can add viscosity and floral notes. Ensure your toppings complement, rather than weigh down, the airy texture. Heavy sauces should be applied sparingly.
### Handling Leftovers Effectively
Pancakes rarely stay on the plate. Proper storage preserves their quality. Allow cooled pancakes to rest in a single layer to prevent steam buildup, which causes sogginess. Stack them with parchment paper or wax paper between them to keep them separate. They can be stored in an airtight container in the refrigerator for up to three days. For longer storage, freeze them individually on a baking sheet before bagging. To reheat, toast them in a toaster or oven to restore crispness. Microwave reheating makes them rubbery, so avoid it if texture matters. Reheating at 350°F for a few minutes brings back the fresh taste.
### Quick Fixes for Undercooked or Burnt Outcomes
Even pros burn a pancake now and then. If the bottom is burnt but the top is raw, cover the pan with a lid. The trapped steam cooks the top faster, allowing the middle to finish without further scorching the bottom. If the pancakes are consistently raw in the center, reduce your heat. Sometimes a higher temperature tricks you into thinking it is cooked, but the heat penetrates too fast. If the batter is undercooked due to running low on heat, move the skillet off the burner and let residual heat finish the job. Conversely, if you realize your batter is too flat, ensure your next batch has fresh baking powder and was not overmixed. Finally, remember that slight variations in altitude and humidity affect cooking times. Observe the visual cues described earlier rather than relying solely on a timer.
### Final Thoughts on Consistency
Making perfect fluffy pancakes is a skill that refines itself over time. Patience is the most underrated ingredient. By mastering your ingredients, respecting the mixing process, and watching the pan closely, you transform a simple breakfast staple into a daily delight. Whether you are feeding a family or enjoying a quiet morning alone, the ritual of crafting fluffy pancakes offers a rewarding sense of accomplishment. With these techniques, you will never settle for flat again. Welcome to your new standard of excellence in the kitchen.